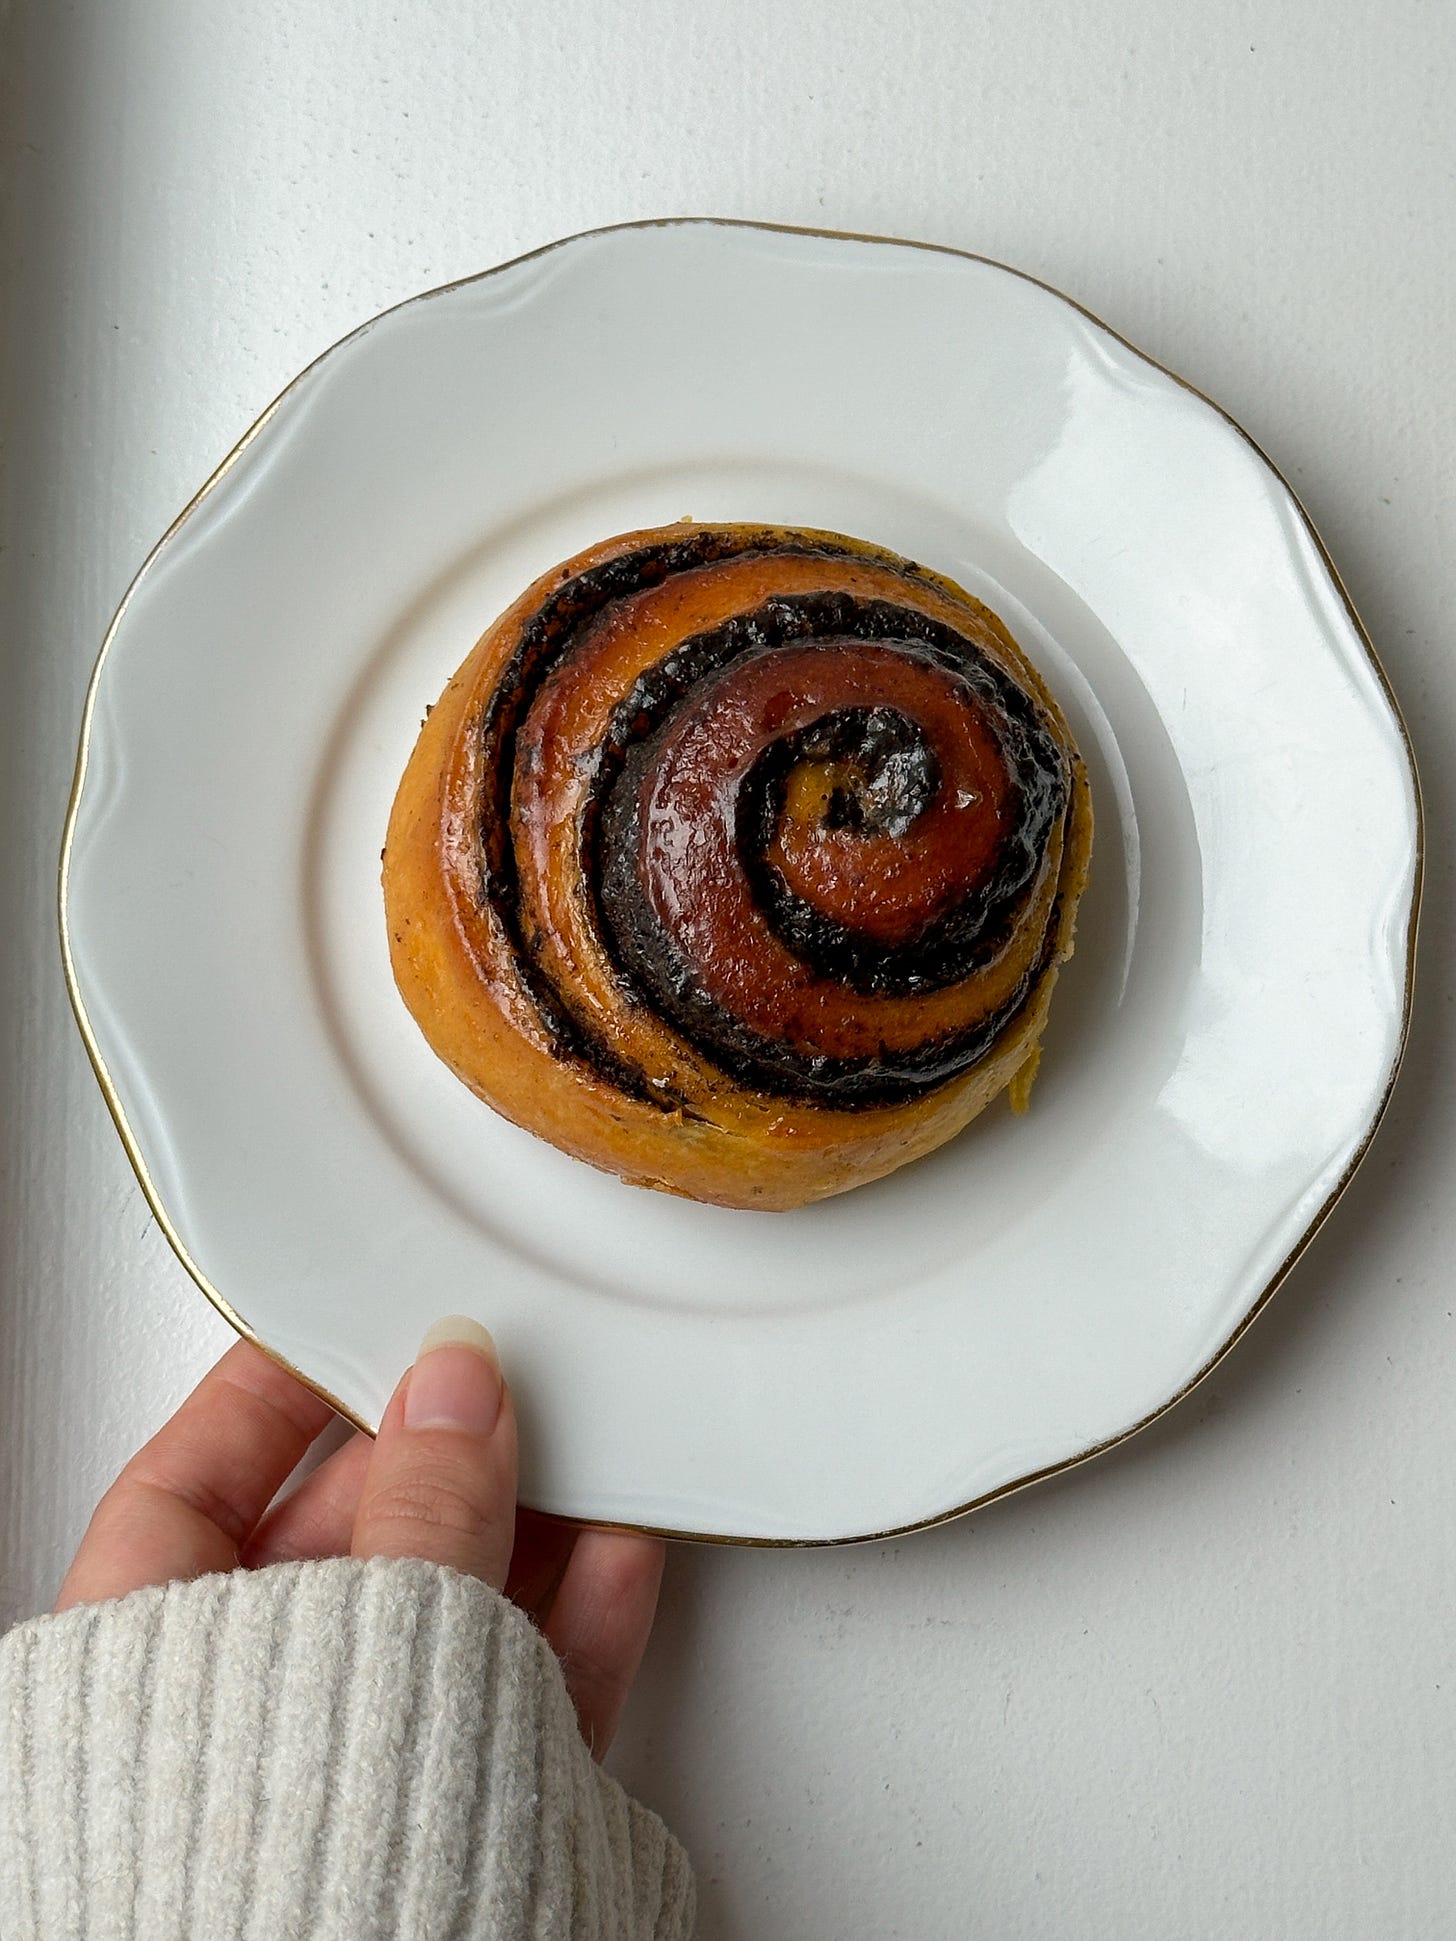
recipe: yuzu-glazed sweet potato & sesame babka buns
why I love baking with milk chocolate & my go-to pumpkin puree substitute
This is my second autumn in Copenhagen, and I’ve found myself homesick for the orange-hued pumpkin treats that appear in American bakeries around this time. I’ve also been missing the chocolatey babka buns and loaves from Jewish bakeries like Essen and Larder, two places that have raised my standards for babka (among other things). Since canned pumpkin is hard to come by in Denmark, I swapped pumpkin puree for a puree of deeply roasted sweet potatoes
Sweet potato doesn’t just lend an orange-yellow hue to the dough—it provides stable moisture that lengthens the shelf-life of the buns. Last year I reduced roasted Hokkaido pumpkin puree as a replacement for canned pumpkin puree, but I wasn’t thrilled by the process and inconsistencies between each pumpkin I purchased. Sweet potatoes were an easy upgrade since they have an even richer color, natural sweetness, and more manageable water content.
Why I love baking with milk chocolate
Dark chocolate is wonderful but I don’t like to use it when it’s not taking center stage, since its brightness and occasional severity tend to overpower calmer flavors like sesame. This became apparent while testing sesame-oil-enriched chocolate chip cookie doughs last year. The less dark the chocolate in my cookie dough, the more I could taste the sesame oil.
Dark chocolate can be the perfect choice for many things—pain au chocolate, rye and cherry chocolate chunk cookies, flourless chocolate tortes, and brownies, to name a few—but a decent milk chocolate has just as much (if not more, in my opinion) flavor nuances and complexities. When baked, milk chocolate offers the creamy, caramelized sweetness of white chocolate while contributing a rich depth and chocolate flavor. It’s my preferred chocolate for chocolate chip cookies and I use it whenever I want chocolate to play a supporting role.
THIC (This Isn’t Chocolate)

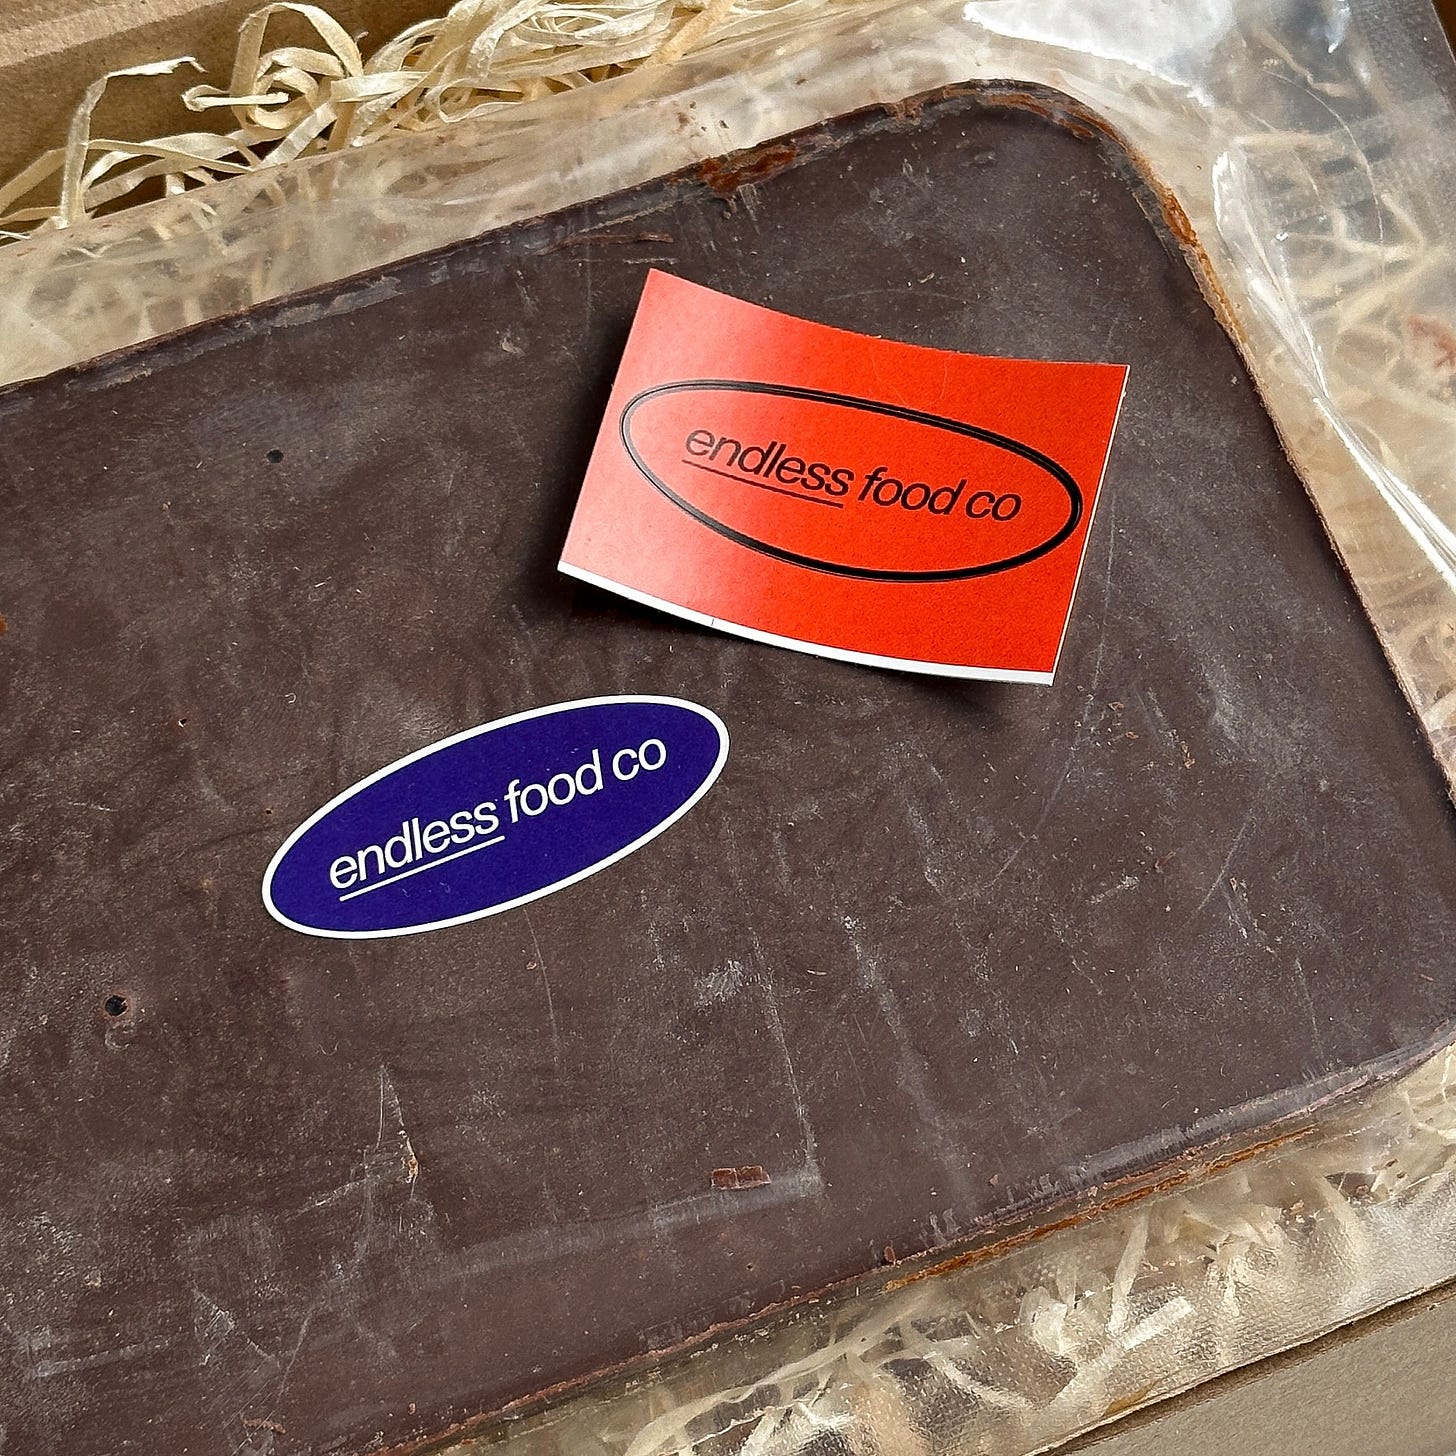
In the beginning stages of testing, I didn’t technically use chocolate at all. My first two batches were made with THIC, This Isn’t Chocolate, an upcycled chocolate proxy made with brewers spent grain from the Copenhagen-based Endless Food Co. I’ve been extremely curious about THIC since seeing that Il Buco used it in their pain au chocolat. Unfortunately, THIC isn’t available for individual consumer purchase yet, but it’s regularly used in products at Diamond Slice, Kihoskh, Polly, Kaf, and JaTak—not that you would know it isn’t chocolate without someone telling you.
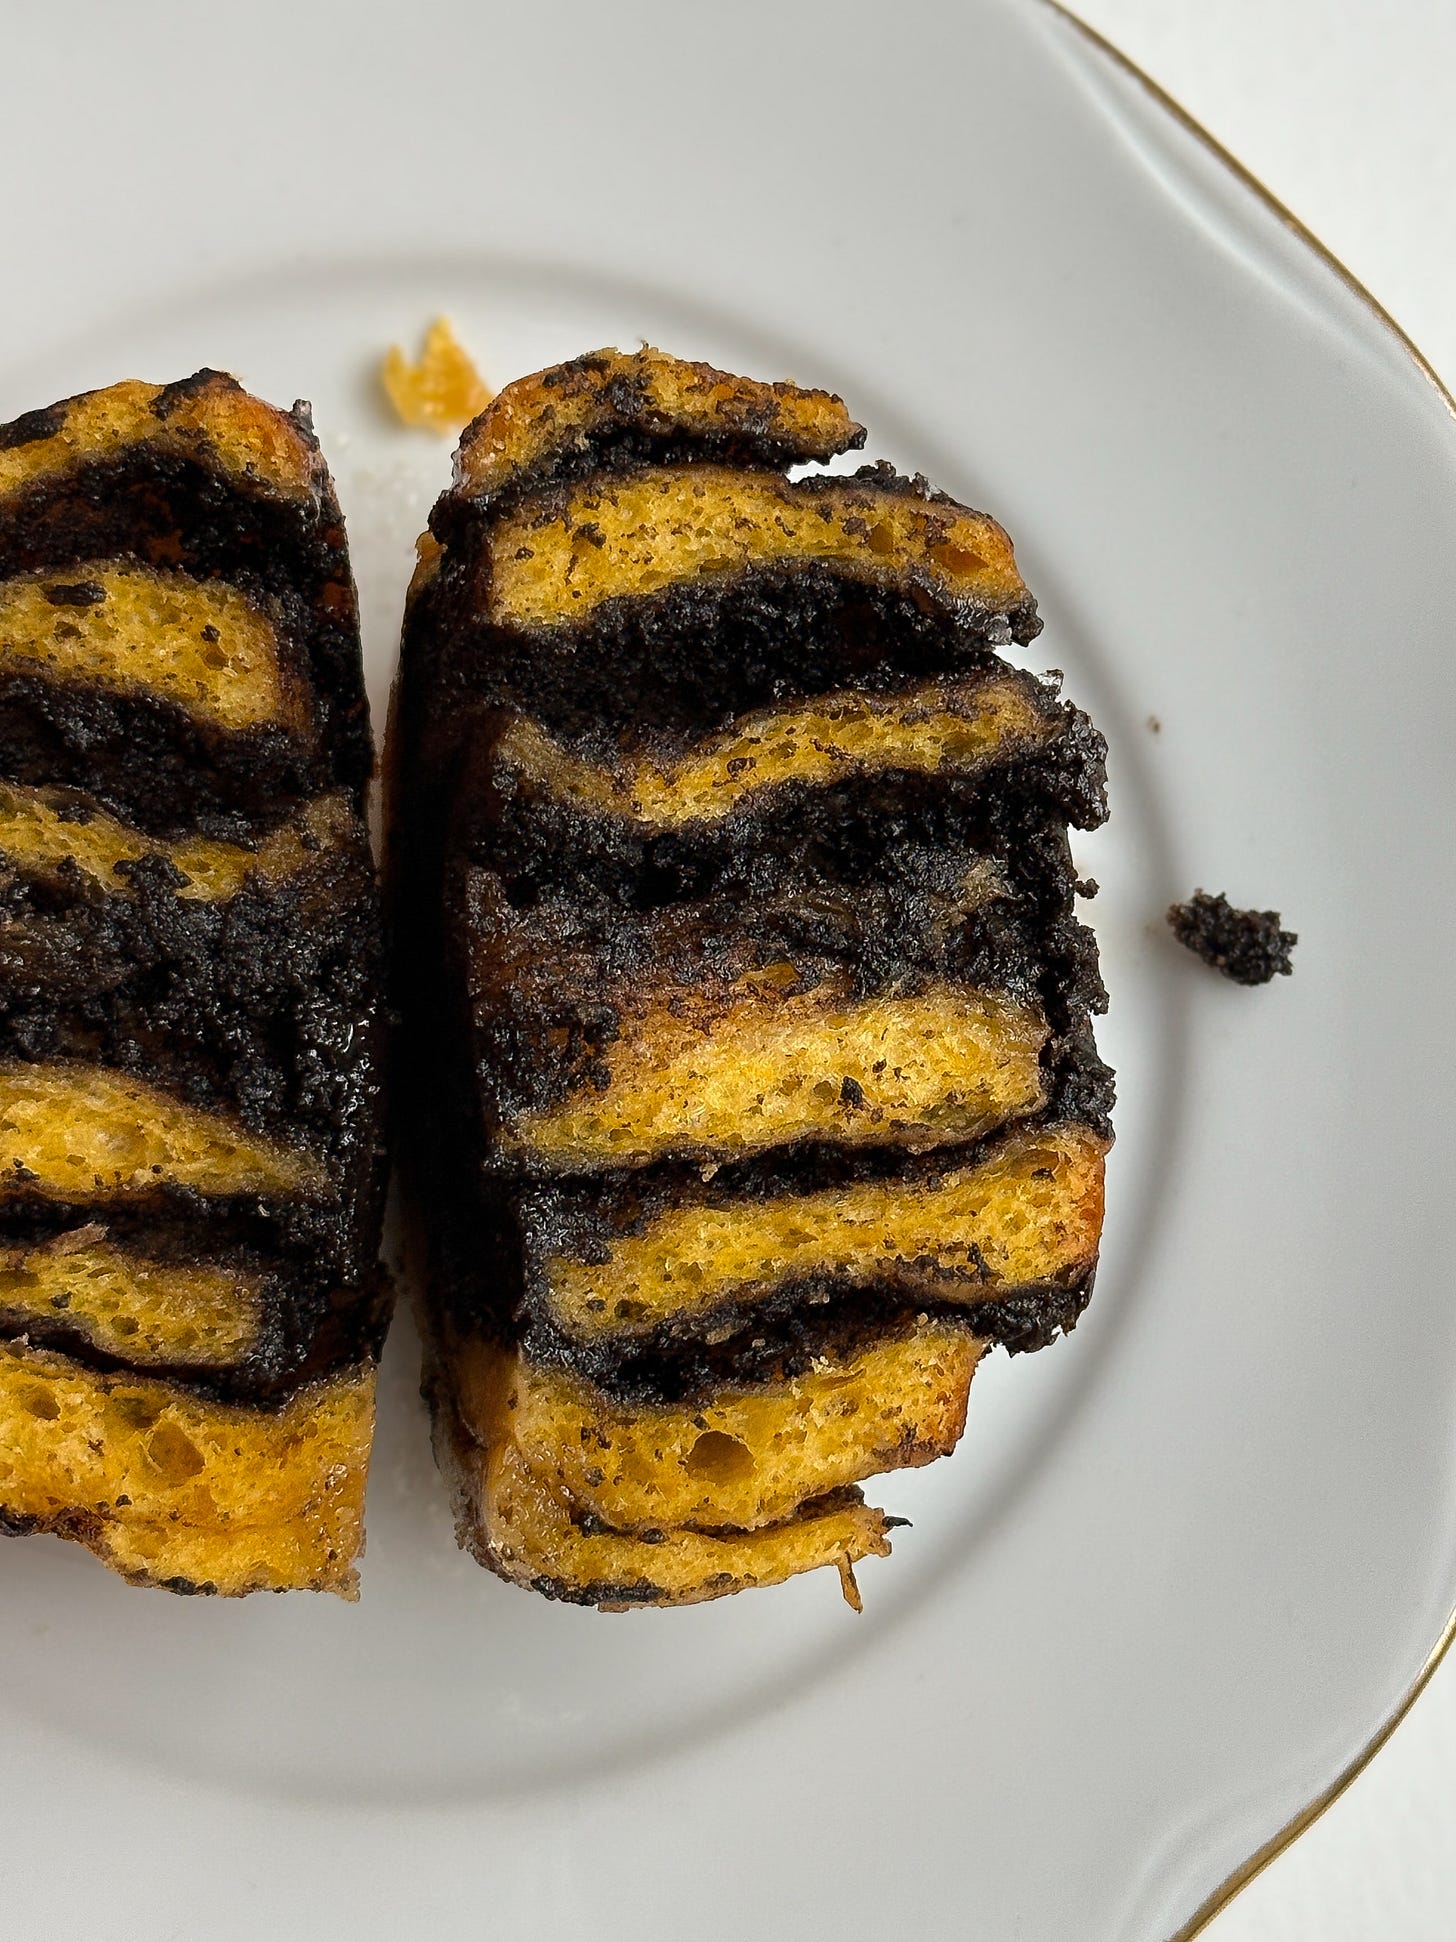
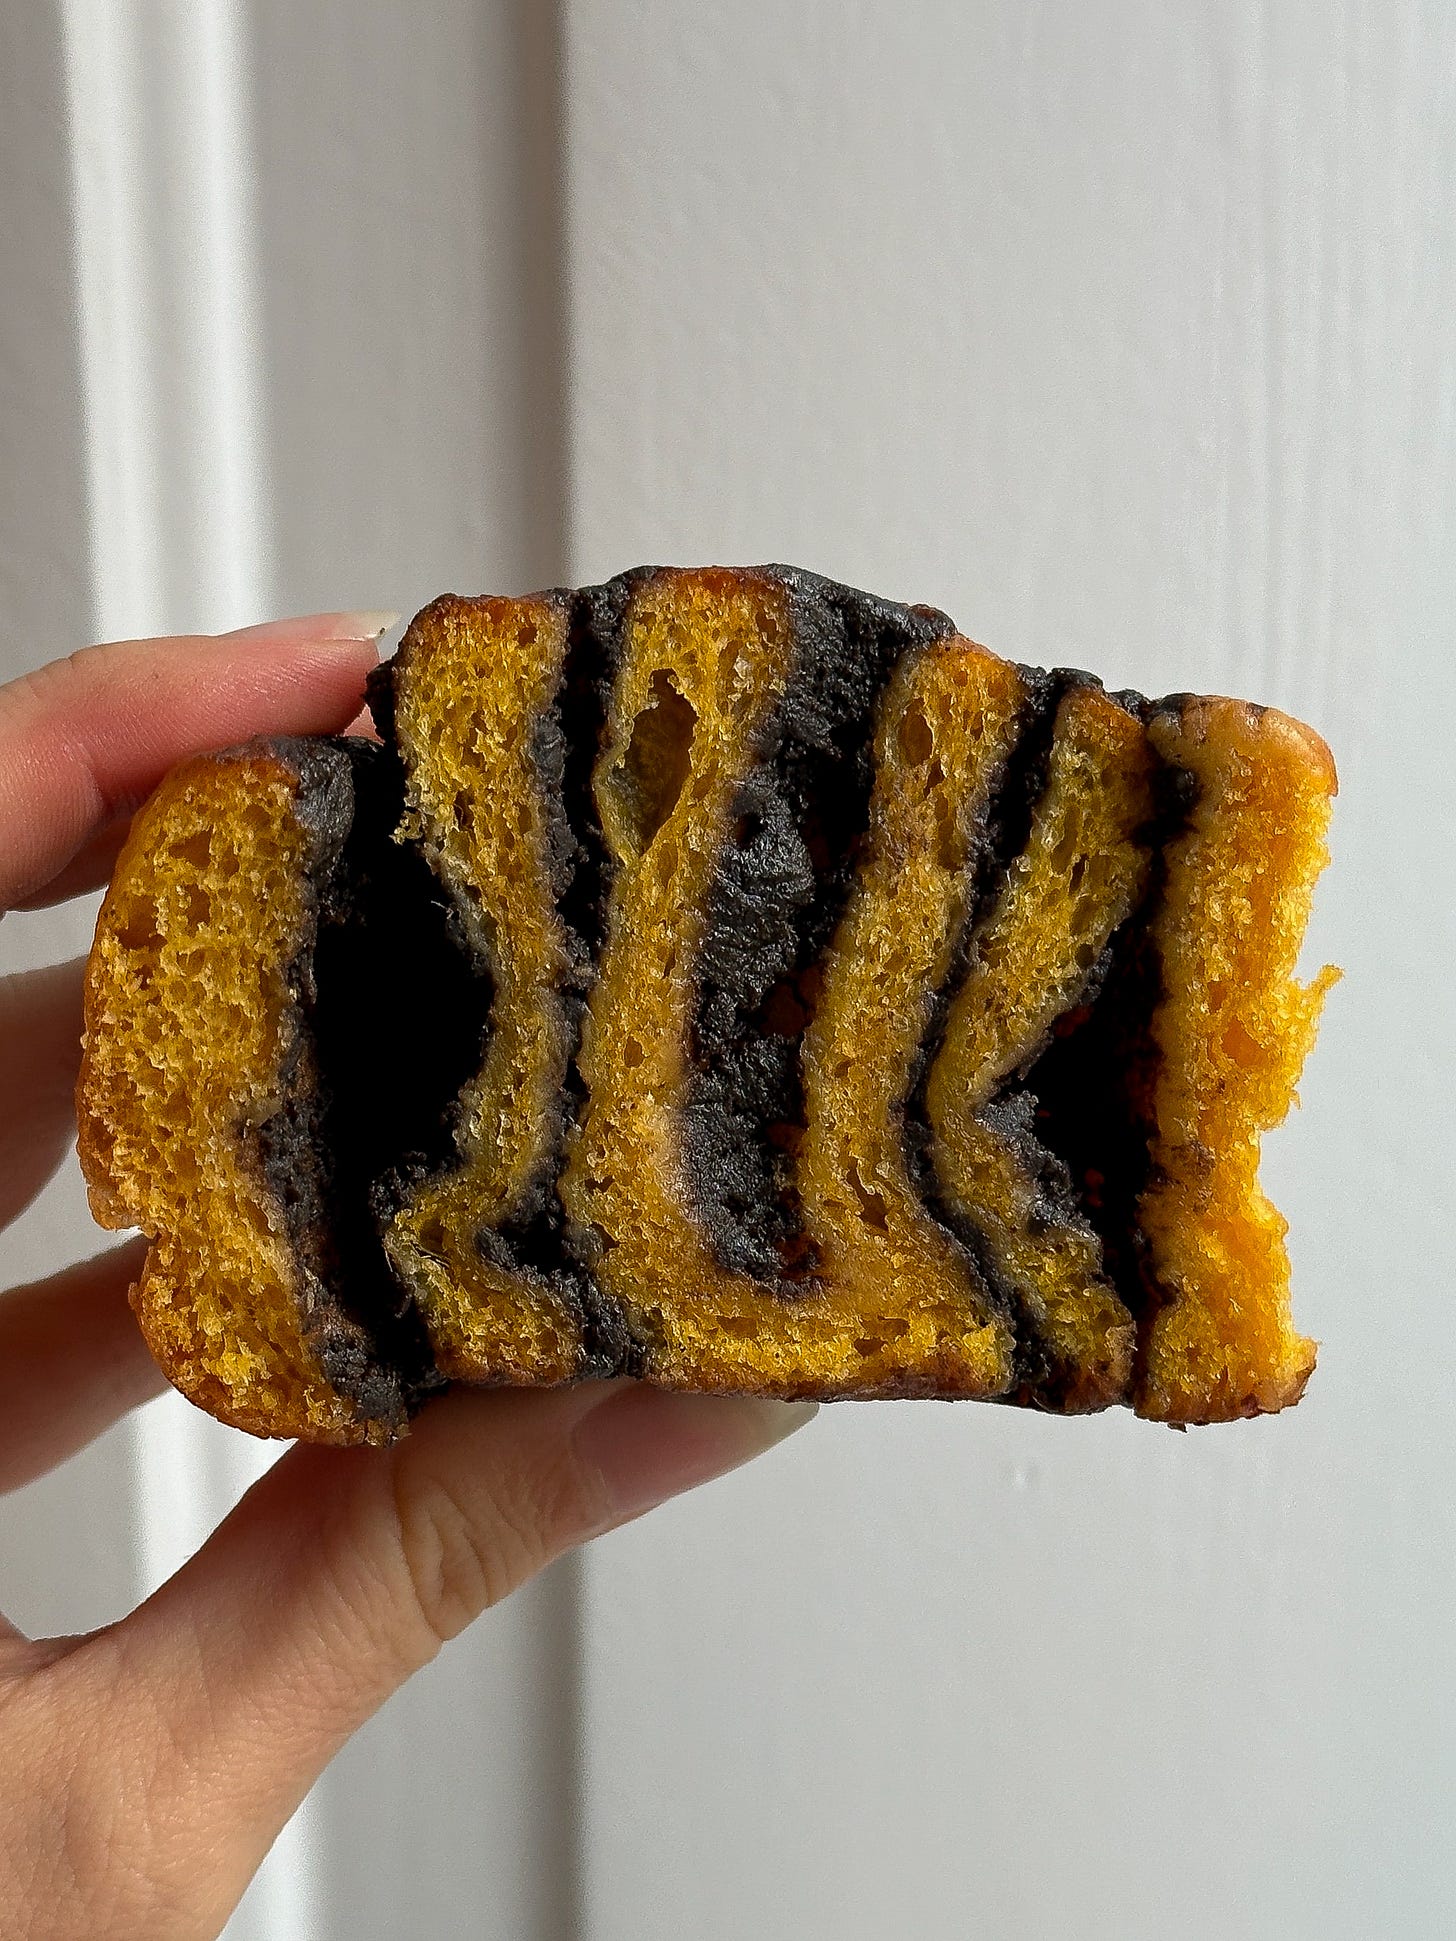
The test batches made with THIC were more manageable to shape and cut, as the filling was set in a way that reinforced the structure of the rolled dough. This meant that the THIC babka buns were more uniform in shape and maintained perfect spirals when cut with a knife. It was a very exciting moment in my kitchen when I realized this, and a disappointing one when the actual chocolate filling was a bit fussier to work with. While the mock chocolate itself didn’t taste exactly like my real chocolate bars, the THIC buns tasted exactly like the milk chocolate buns I made after.
notes & modifications:
You can substitute the yuzu juice in the glaze with equal parts orange juice. To omit the citrus completely, make a simple syrup with a 1:1 water-to-sugar ratio (so, 75g water and 75 g sugar).
Any mild chocolate is fine here, and you don’t have to get fancy with it. The darker the chocolate, the more it will overpower the sesame. I tested this recipe with Lindt’s 50% cocoa milk chocolate; Lindt’s 70% cocoa mild dark chocolate; Endless Food Co.’s upcycled chocolate proxy, THIC (This Isn’t Chocolate), which performed beautifully; and Björnsted’s dark milk chocolate. The sesame came through best with the milder milk chocolates (including THIC), and I quite liked the contrast of using darker chocolates for the optional chopped chocolate pieces that get added before rolling.
Use unflavored dental floss to cut perfect spirals. Like this.
Do not substitute the bread flour with a lower protein flour. I have made these with varying amounts of butter, sweet potato puree, oil, and egg yolks/whole eggs. No matter how much I enriched the brioche in testing, it stood up to added water and fat content as long as I stuck with strong bread flour (I use Amos Strong Bread Flour at home, which has 14 g of protein per 100 g of flour).
sweet potato brioche
(can be made up to 2 days before baking)
tangzhong
ingredients
190 g whole milk
40 g strong bread flour
method
In a small saucepan, whisk together the milk and flour. Cook over medium-high heat, whisking constantly, until thickened to the consistency of smooth mashed potatoes. Transfer to a bowl and set aside to cool completely (it must at least be room temp) until ready to use. To speed up the process, you can chill it in the fridge, stirring every 10 minutes. To ensure a smooth tangzhong, your whisk should come into contact with the bottom and sides of the pan. You can take your pan off the heat occasionally to ensure it is cooking evenly.
sweet potato puree
ingredients
450 g sweet potatoes
method
Preheat your oven to 190 C/370 F.
Pierce the sweet potatoes all over with a fork. Roast until tender and syrupy, about 50-70 minutes depending on the size of your potatoes.
Let the potatoes cool until they are room temp. Peel off the skins and puree in a blender or food processor until smooth. Set aside until ready to use. You can use up any leftover puree as an addition to oatmeal or yogurt.
the rest of the dough
ingredients
tangzhong, from above
160 g sweet potato puree, from above
2 tsp active dry yeast
390 g strong bread flour
40 g brown sugar
1 1/2 tsp fine sea salt
1 tsp vanilla extract, optional
2 large egg yolks, straight from the fridge
1 tablespoon neutral oil (I used a mild olive oil for this)
80 g unsalted butter, cubed and softened to room temp
method
Whisk together the flour, active dry yeast, brown sugar, and fine sea salt. Add this to the bowl of a stand mixer fitted with a dough hook.
In a separate bowl or large measuring cup, whisk together the tangzhong, sweet potato puree, vanilla extract, egg yolks, and oil until fully emulsified. Pour this into the bowl with your flour mixture. Mix on low until no dry spots remain, stopping to scrape the bowl a few times.
Add half of the softened butter and mix until there are no visible bits of butter in the dough.
With the mixer running, add the remaining cubes of butter, piece by piece. Continue to mix until the dough is smooth and elastic. You should be able to slowly stretch a small piece of dough thin enough that light can pass through it without breaking. I like to switch to hand-kneading after the butter disappears into the dough. It comes together fairly easily at this point and rarely needs additional flour. However, moisture content and absorption may vary. You can work more flour into the dough if it doesn’t come together after 15-20 minutes of kneading.
Form your dough in a rough ball and place it into a large lightly greased bowl. Cover with plastic wrap or a damp tea towel. Leave to rise for 1-2 hours at room temp, or until almost doubled in size. This time will depend on the conditions of your kitchen. It is getting quite cold in Copenhagen, so it took closer to 2 hours for my dough to rise. You can always place it in a warmer environment, like a laundry room with a running dryer.
Store in the warmest part of your fridge, covered, for at least 6 hours but preferably overnight.
chocolate sesame filling
(can be made a day prior, but may need to be reheated to a working temperature)
ingredients
100 g milk chocolate, roughly chopped
40 g butter, cubed
100 g black sesame paste, stirred thoroughly
80 g brown sugar
1 tablespoon toasted sesame oil, optional for a richer sesame flavor
method
Combine the 100 g chopped chocolate and 40 g butter in a medium, heat-safe bowl that can fit over a pot of water.
Boil just enough water to produce steam, but not so much that the bowl with your chocolate and butter touches the water. Lower the heat and place the bowl of chocolate over the steaming water. Melt the butter and chocolate, stirring occasionally, until smooth. Turn off the heat.
Stir in the black sesame paste, brown sugar, and optional sesame oil. Set aside to cool until it is the consistency of spreadable peanut butter or Nutella. You can quicken this process by refrigerating the filling and stirring every few minutes, but be careful as it can harden and set quickly. If it hardens too much, bring it back to room temp by reheating it gently over water.
yuzu glaze
(can be made as the buns bake)
ingredients
2 tablespoons yuzu (or orange) juice
3 tablespoons water
75 g sugar
method
In a small saucepan, bring all ingredients to a boil. Turn off the heat and set aside until ready to use.
egg wash
(must be made right before baking)
ingredients
1 large egg
1 tablespoon of water, cream, or milk
method
Whisk all ingredients together until frothy and set aside.
assembly & bake
makes 12 buns
ingredients
sweet potato brioche dough
chocolate sesame filling
optional, for extra chocolate bits: 60 g finely chopped chocolate
yuzu glaze
flour, for dusting your work surface
egg wash
softened butter, for greasing the pan
optional: toasted black sesame seeds and/or pearl sugar, for topping
method
For taller buns that are closer together: Generously butter a 22.9 cm x 33 cm/9 in x 13 in baking tin or a 23 cm x 34 cm casserole dish. For flatter buns that grow outward: Generously butter two 20 cm x 27 cm casserole dishes.
Generously dust your work surface with flour. Remove your chilled dough from the fridge, place it on your prepared surface, and punch it down to degas it.
Roll the dough into a rectangle about 41 cm x 33 cm and no thinner than 6 mm, picking up the dough and dusting flour underneath every few rolls to ensure it isn’t sticking. Don’t worry too much about the dimensions here; you just want a long rectangle that isn’t too thin. I also like to shape it into a rectangular shape with my hands before rolling it to encourage an even shape.
Using an offset spatula or spoon, evenly spread the chocolate sesame filling over the dough. Spread the 60 g chopped chocolate evenly over the sesame filling, if using.
Starting with one of the long edges, roll the dough into a tight log. Pinch the seams and gently even out the thickness of the log with your hands if needed. Place seam-side down on a floured work surface.
Trim off the tapered ends of your log. Cut the log in half, then cut each half into 3 sections, so you have 6 pieces of dough. Cut the dough pieces in half again, so you end up with 12 rolls. Alternatively, you can measure your log, divide the length by 12, and score the dough into 12 equal portions. I prefer to eyeball it since it allows me better control over portioning.
Place the rolls in a 3 x 4 grid in your baking tin, spaced evenly apart. If using two 20 cm x 27 cm baking dishes, place them in a 2 x 3 configuration. Cover with plastic wrap or a damp tea towel and proof until the buns are puffy and touching one another, about 1-2 hours depending on your kitchen.
Halfway through your proofing time, preheat your oven to 180 C/350 F.
Using a pastry brush, gently brush your proofed buns with the egg wash. Bake for 25-30 minutes, until evenly golden brown. Rotate your pan halfway through if your buns are coloring unevenly, and cover with foil or a lid if they take on color too fast.
Remove the buns from the oven and immediately brush with all of the yuzu glaze. Top with a sprinkle of sesame seeds and/or pearl sugar, if using. Allow to cool completely before serving, or at least 30 minutes.
These can be eaten fresh but—as I prefer with more traditional babka loaves—I prefer them the day after baking, when the filling has set completely. These can be wrapped tightly in plastic and kept on the counter for 2-3 days in a cool kitchen.


I just baked this guys and they’re out of this world! thank you! 🤎🫶🏼
Im in awe… these look incredible